

Amateur Radio Station
![]()
![]()
![]() Portable HF Station Kit
Portable HF Station Kit ![]()
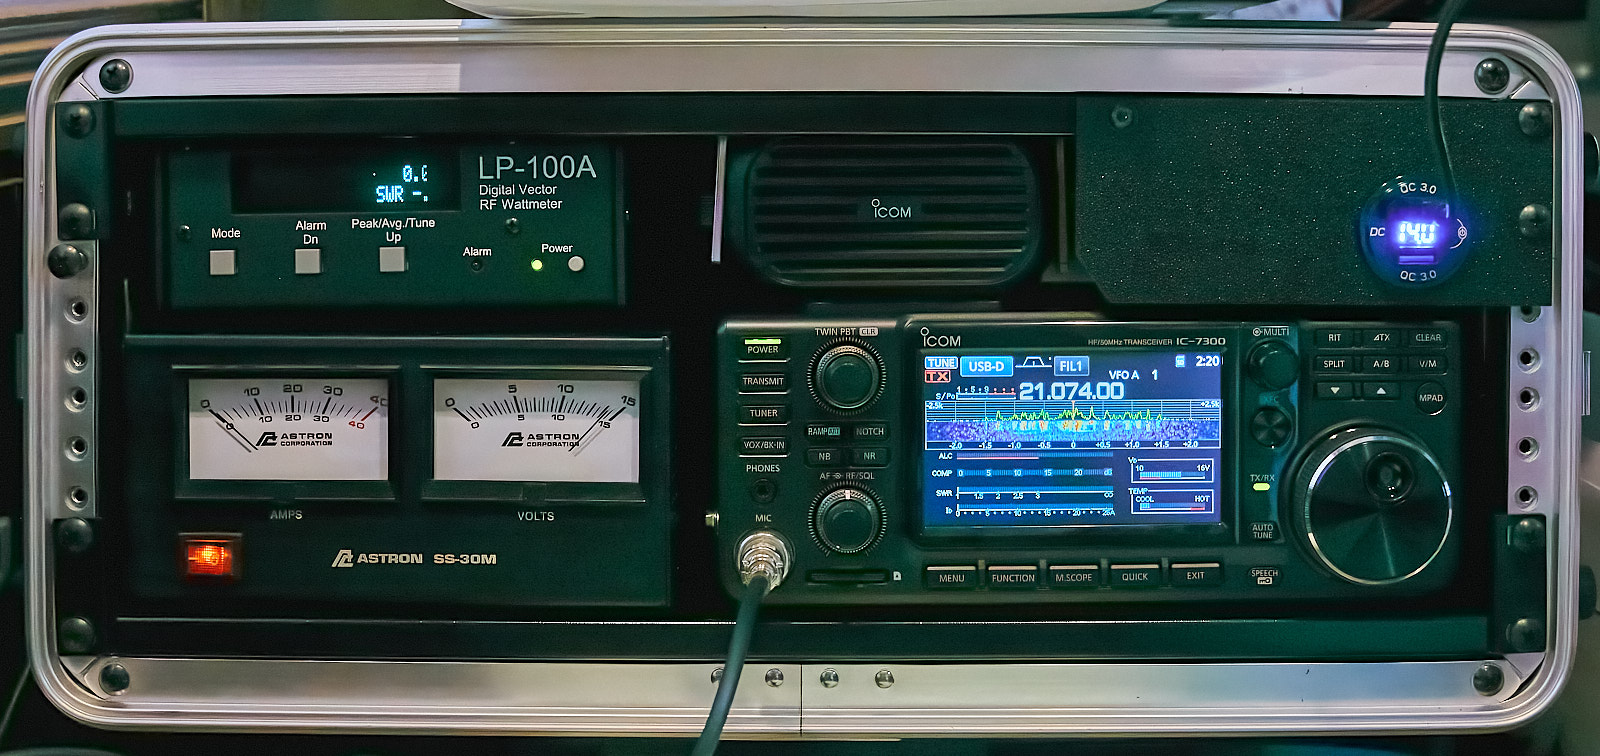
I use a Seismic 4RU portable case and have mounted the following in it:
- Icom IC-7300 with mount
- Astron SS-30M 30A 13.8VDC Power Supply
- LP100 Digital Vector RF Wattmeter
- Icom SP-35 Speaker
- Two Rack Shelfs
You can see the two shelf’s, one mounted upside down on the top and the other at the bottom. The Icom mount is mounted to the lower shelf along with the power supply. The upper shelf has the LP100 and its sensor (separate box) and the speaker mounted to the upper shelf. To keep things from bouncing around I secured each shelf about 2/3 of the way towards the rear with a small block of wood and a screw into the case.
The rear uses 1/4 plywood with a fixed 1″ section at the bottom which hinges the upper section.
I took the dinette in our travel trailer and turned it sideways. Of course you can not use the table for dinning anymore but that is ok with us.
Schematic:
Photos:


![]() Portable HF Antenna Setup on our Travel Trailer
Portable HF Antenna Setup on our Travel Trailer
- Custom bottom ladder mount. I used two layers of a cheap cutting board bolted to a custom L-bracket I welded up and mounted the assy to the RV ladder. You would not have to weld it you could bolt it all together.
- Two sets of Manfrotto 35 supper clamp and Monoprice O-Clamp each.
- MFJ MFJ-1906H Fiberglass Pole.
- Small swivel with small clamp at the top of the mast.
- DIY 49:1 matching unit. Video.
- No 22 Poly-Stealth Antenna Wire (two wire lengths for 40 & 80 meters).
- 50′ of Times Microwave LMR-240 coax.
I installed the L-Bracket and the clamps to hold the fiberglass pole to the ladder. I then run the wire through the swivel at the top and out to a tree with a small string. Then raise a couple of the mast sections with the mast still mounted to the ladder. Using a small bungy I secured the 49:1 matching unit about 1-foot above the ground. Then at the other end I used a small string thrown up into a tree and tighten it slightly not to bend the fiberglass pole too much. If you raise all the sections of the pole you will need to guy it.
Click on a photo to make it larger…


![]()
![]()